Piping bags or plastic bags with a small cut tip for decorating
Toothpicks (optional, for detailed icing work)
Ingredients
Sugar cookies (store-bought or homemade)
White icing or royal icing
Large marshmallows
Black decorating gel or edible marker
Orange candy or icing for the nose
Mini chocolate chips or candy for buttons
Assorted colored icing for scarves and other decorations
Notes
How to Make 
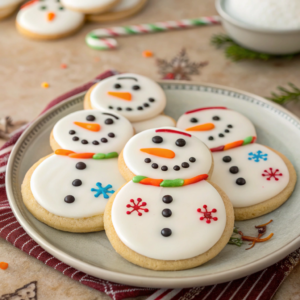
Melted Snowman Cookies
Step 1: Bake or Buy Your Sugar Cookies
If you’re short on time, store-bought sugar cookies work perfectly for this recipe. However, if you prefer the homemade touch, bake a batch of your favorite sugar cookie recipe. Aim for round shapes to resemble the snowman’s melted puddle. Allow the cookies to cool completely before decorating.
Step 2: Prepare the Base Icing
Using white icing or royal icing, spread a generous amount over the surface of each cookie. Don’t worry about making it perfectly even; the irregular edges mimic the appearance of melting snow.
Step 3: Create the Snowman’s Head
Place a large marshmallow slightly off-center on each cookie to represent the snowman’s head. Press down gently to secure it in place.
Step 4: Add Facial Features and Details
Using black decorating gel or an edible marker, draw eyes and a mouth on the marshmallow. For the nose, use a small dab of orange icing or attach a tiny orange candy.
Step 5: Decorate the Snowman’s Body
Add mini chocolate chips or small candies as buttons below the marshmallow. Use colorful icing to draw scarves, hats, or arms to give each snowman a unique personality.
Step 6: Let the Icing Set
Allow the cookies to sit for about 30 minutes, or until the icing hardens slightly. This makes them easier to handle and ensures the decorations stay in place.