
Introduction: Why Your Family Will Love These Banana Pancakes
There’s something truly special about waking up your little ones to the comforting smell of banana pancakes cooking on the stove. It’s those little moments that make a house feel like home. Whether you’re preparing breakfast for your family before they head out the door or enjoying a cozy weekend morning together, banana pancakes are a heartwarming way to show your love.
i like to know about 14 Things To-Do With Cake Mix (aside from baking a cake!) for more idee
This recipe is perfect for moms (or anyone!) who want to whip up a quick, wholesome meal that everyone will enjoy. Plus, it’s a great way to use those spotty bananas sitting on the counter—because let’s be honest, we all have them! So, let’s make magic happen in the kitchen with these fluffy, delicious banana pancakes.
Ingredients You’ll Need
Here’s everything you’ll need to make these pancakes:
- 2 ripe bananas (mashed)
- 1 cup all-purpose flour
- 1 tablespoon sugar
- 1 teaspoon baking powder
- ½ teaspoon baking soda
- ¼ teaspoon salt
- 1 large egg
- ¾ cup milk (dairy or non-dairy)
- 1 tablespoon melted butter or vegetable oil
- 1 teaspoon vanilla extract
- Butter or oil for cooking
A Few Notes from Mom:
- Make sure your bananas are nice and ripe—the riper, the better! They add natural sweetness.
- Feel free to use any milk you have on hand. I love using almond milk for a dairy-free option.
- If you’re out of vanilla extract, don’t worry! The pancakes will still taste amazing.
Kitchen Equipment
Here’s what you’ll need to make cooking easy:
- Mixing bowls (because moms know one is never enough!)
- Whisk or fork
- Measuring cups and spoons
- Non-stick frying pan or griddle
- Spatula
- Ladle or measuring cup for pouring the batter
Step-by-Step Directions
Step 1: Mash the Bananas
Peel your ripe bananas and place them in a mixing bowl. Use a fork to mash them up until they’re nice and smooth—some small lumps are totally fine. This is a fun step to let the kids help with!
Step 2: Mix the Dry Ingredients
In another bowl, whisk together the flour, sugar, baking powder, baking soda, and salt. This helps everything mix evenly.
Step 3: Combine Wet Ingredients
Pour the mashed bananas, egg, milk, melted butter, and vanilla into the dry ingredients. Stir gently until just combined. Don’t worry if the batter is a bit lumpy—it’s supposed to be!
Step 4: Heat the Pan
Preheat a non-stick frying pan or griddle over medium heat. Add a little butter or oil to keep the pancakes from sticking.
Step 5: Cook the Pancakes
Use a ladle or ¼ cup measure to pour the batter onto the pan. Cook each pancake for 2-3 minutes, or until you see bubbles forming on the surface. Flip and cook for another 1-2 minutes until golden brown.
Step 6: Serve with Love
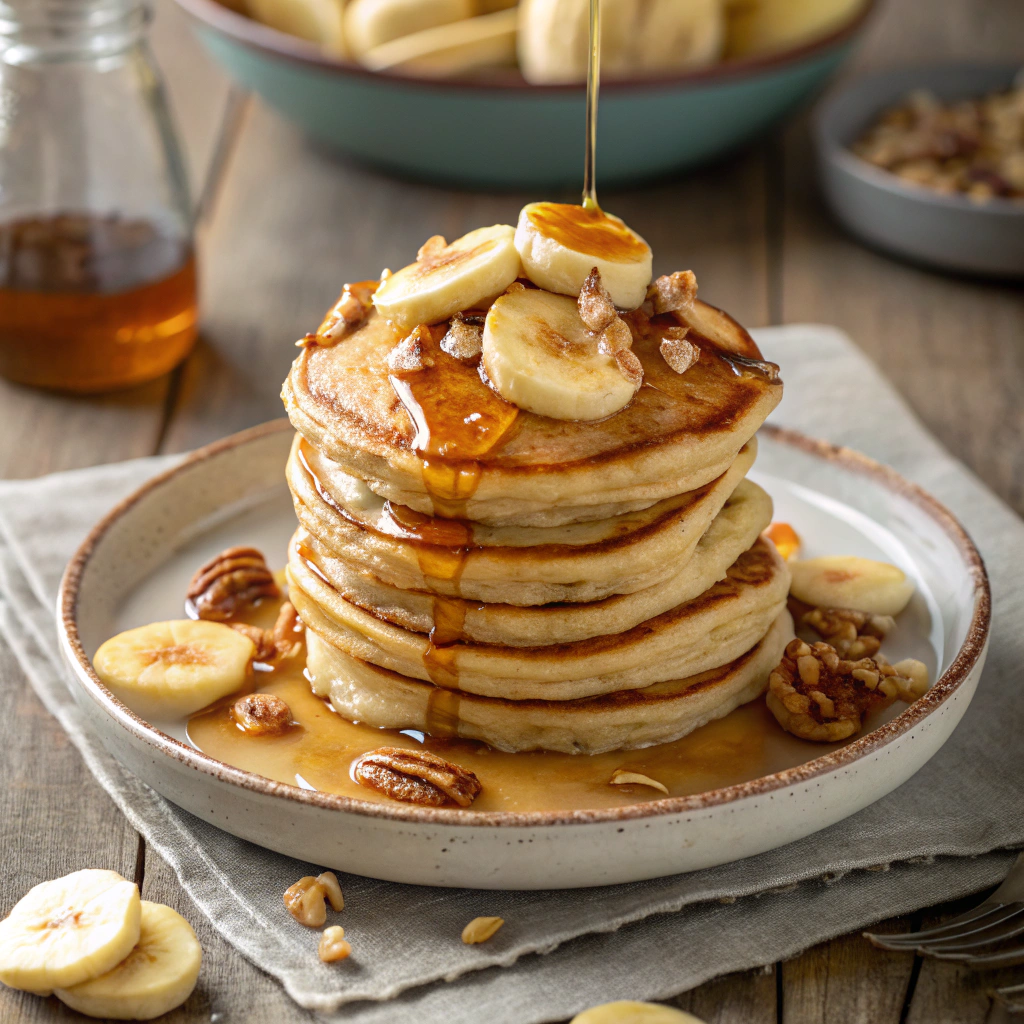
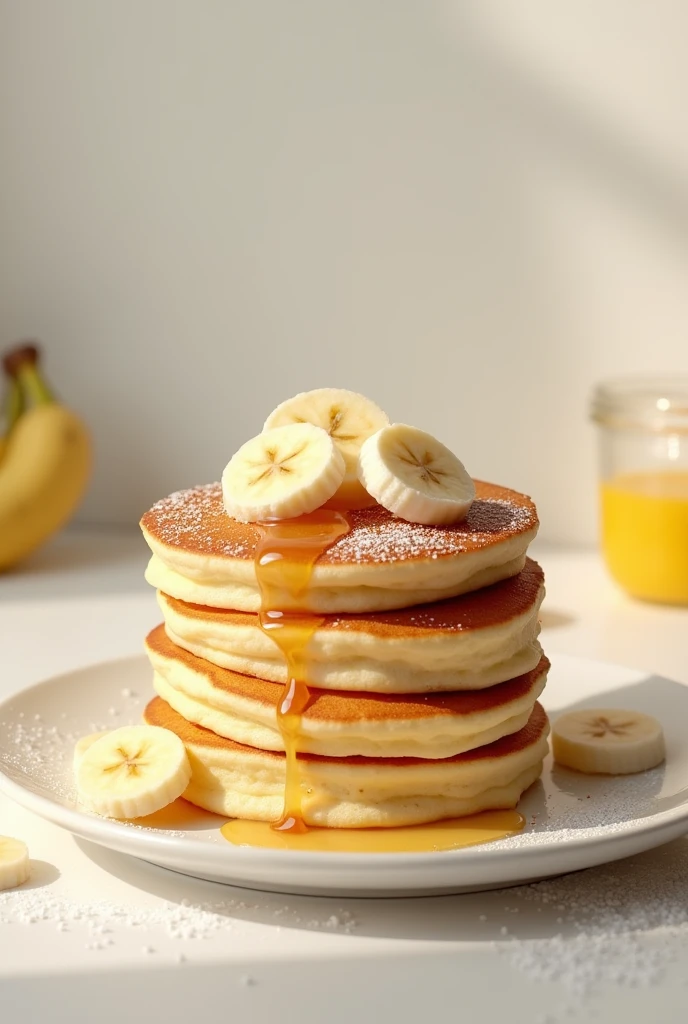
Serve these warm pancakes with whatever toppings your family loves—maple syrup, fresh berries, or a sprinkle of powdered sugar. And don’t forget the hugs and kisses!
Mom Tips for Perfect Pancakes
- Don’t stress about lumps in the batter. A few lumps are fine and actually help keep the pancakes fluffy.
- Use a non-stick pan to make flipping easier. Less mess means a happier mom!
- Watch for bubbles before flipping. It’s a good sign the pancake is ready.
- Keep the heat medium-low to avoid burning the pancakes. Slow and steady wins the race.
Variations and Recipe Swaps
One thing moms know well? Flexibility is key! Here are some fun ways to change things up:
- Chocolate Chip Banana Pancakes: Sprinkle chocolate chips into the batter for a sweet surprise.
- Gluten-Free Pancakes: Use a gluten-free flour blend to keep things allergy-friendly.
- Vegan Pancakes: Replace the egg with a flax egg (1 tablespoon flaxseed meal + 3 tablespoons water) and use plant-based milk.
- Nutty Pancakes: Add chopped walnuts or pecans for a bit of crunch.
How to Store and Reheat Leftovers
Storing:
Let the pancakes cool completely before putting them in a container or resealable bag. Store in the fridge for up to 3 days.
Freezing:
If you want to save them for later, lay them out in a single layer on a baking sheet and freeze for an hour. Then transfer to a freezer-safe bag. They’ll keep for up to 3 months.
Reheating:
Pop them in the toaster for a quick reheat, or warm them in a non-stick pan. You can also microwave them for 20-30 seconds.
Perfect Pairings for Banana Pancakes
Here’s what I love serving with these pancakes:
- Maple Syrup: The classic choice, and my kids’ favorite.
- Fresh Berries: Adds a pop of color and freshness.
- Yogurt: A dollop of Greek yogurt makes these pancakes feel fancy.
- Coffee for Mom, Milk for the Kids: Because we all deserve a little treat with breakfast!
A Little Love from My Kitchen to Yours
There’s nothing quite like making a homemade breakfast for the people you love. These banana pancakes are a simple, sweet way to start your day together. And remember, it’s not just about the food—it’s about creating memories around the kitchen table.
If you try this recipe, I’d love to hear about it! Share your thoughts in the comments, send me a picture, or tag me on social media. And don’t forget to subscribe to our blog for more family-friendly recipes that bring a little extra love into your home.
FAQ
1. Can I make banana pancakes without eggs?
Absolutely! Replace the egg with a flax egg (1 tablespoon flaxseed meal + 3 tablespoons water) or just use an extra mashed banana.
2. How do I know when to flip the pancakes?
Wait until you see bubbles forming on the surface of the pancake. Once they pop and the edges look set, it’s time to flip.
3. Can I freeze banana pancakes?
Yes! These pancakes freeze beautifully. Just make sure to freeze them in a single layer first so they don’t stick together.
4. What other fruits can I use in this recipe?
Feel free to swap the bananas for mashed sweet potatoes, pumpkin puree, or applesauce for a fun twist.
5. How can I make my pancakes extra fluffy?
Make sure your baking powder and baking soda are fresh. And remember—don’t overmix the batter!
banana pancakes
Equipment
- Mixing bowls (because moms know one is never enough!)
- Whisk or fork
- Measuring cups and spoons
- Non-stick frying pan or griddle
- Spatula
- Ladle or measuring cup for pouring the batter
Ingredients
- 2 ripe bananas (mashed)
- 1 cup all-purpose flour
- 1 tablespoon sugar
- 1 teaspoon baking powder
- ½ teaspoon baking soda
- ¼ teaspoon salt
- 1 large egg
- ¾ cup milk (dairy or non-dairy)
- 1 tablespoon melted butter or vegetable oil
- 1 teaspoon vanilla extract
- Butter or oil for cooking
Notes
Step-by-Step Directions
Step 1: Mash the Bananas
Peel your ripe bananas and place them in a mixing bowl. Use a fork to mash them up until they’re nice and smooth—some small lumps are totally fine. This is a fun step to let the kids help with!Step 2: Mix the Dry Ingredients
In another bowl, whisk together the flour, sugar, baking powder, baking soda, and salt. This helps everything mix evenly.Step 3: Combine Wet Ingredients
Pour the mashed bananas, egg, milk, melted butter, and vanilla into the dry ingredients. Stir gently until just combined. Don’t worry if the batter is a bit lumpy—it’s supposed to be!Step 4: Heat the Pan
Preheat a non-stick frying pan or griddle over medium heat. Add a little butter or oil to keep the pancakes from sticking.Step 5: Cook the Pancakes
Use a ladle or ¼ cup measure to pour the batter onto the pan. Cook each pancake for 2-3 minutes, or until you see bubbles forming on the surface. Flip and cook for another 1-2 minutes until golden brown.Step 6: Serve with Love
Serve these warm pancakes with whatever toppings your family loves—maple syrup, fresh berries, or a sprinkle of powdered sugar. And don’t forget the hugs and kisses!Mom Tips for Perfect Pancakes
- Don’t stress about lumps in the batter. A few lumps are fine and actually help keep the pancakes fluffy.
- Use a non-stick pan to make flipping easier. Less mess means a happier mom!
- Watch for bubbles before flipping. It’s a good sign the pancake is ready.
- Keep the heat medium-low to avoid burning the pancakes. Slow and steady wins the race.