
How to Make Perfect Snowball Cookies: A Step-by-Step Guide
As a busy mom who loves creating sweet memories in the kitchen, there’s nothing more satisfying than baking a batch of cookies that bring joy to the whole family. Snowball cookies—soft, buttery, and coated in a dreamy layer of powdered sugar—are one of my favorite treats to make, especially during the holidays. They’re simple enough for the kids to help with and elegant enough to serve at a party. In this post, I’ll share my go-to recipe along with tips and variations to make these little bites of happiness perfect every time.
Why You’ll Love This Recipe
This snowball cookie recipe is for moms, families, and anyone who:
- Wants a delicious, nostalgic treat to share with loved ones.
- Needs an easy but impressive dessert for gatherings.
- Loves recipes that double as fun, interactive activities with kids.

Let’s get started and bring some joy to your kitchen!
Article
What Are Snowball Cookies?
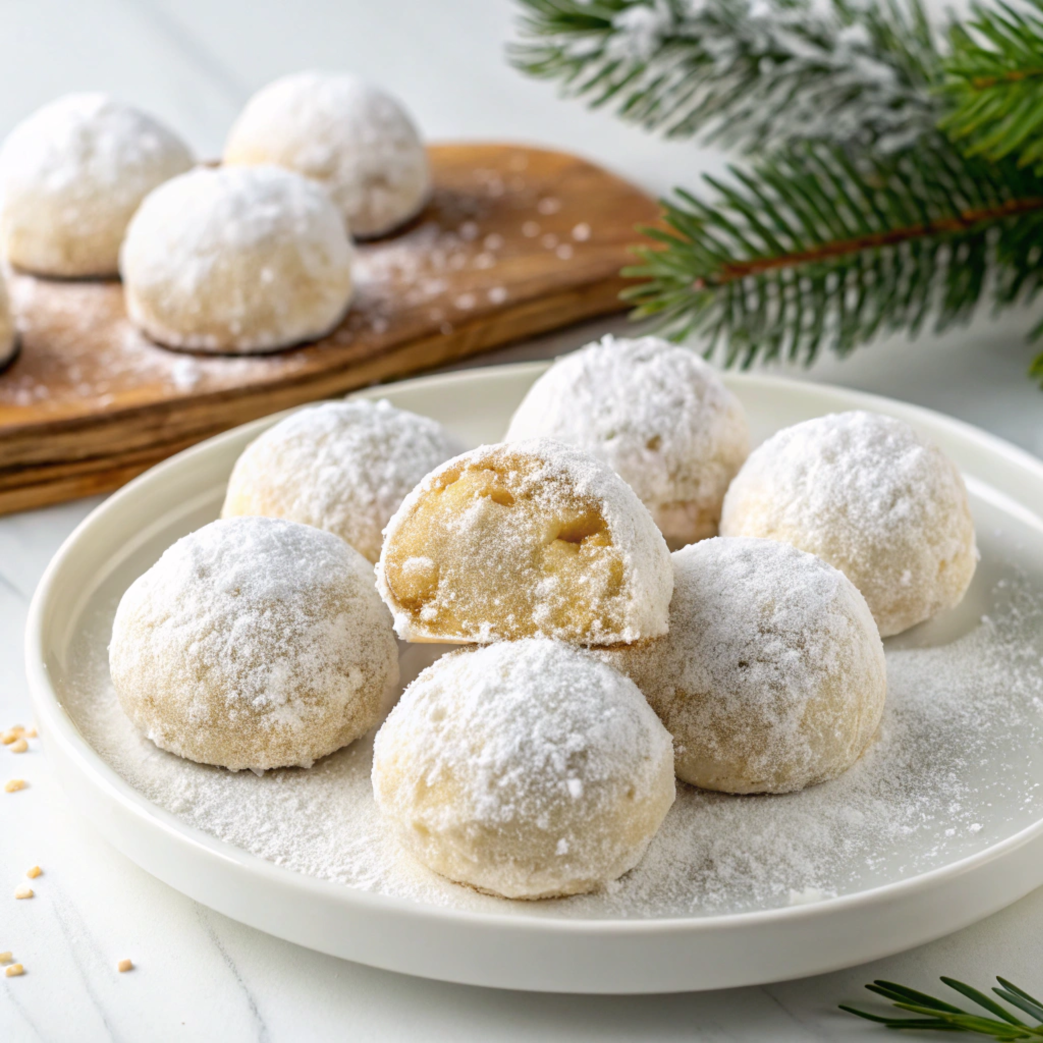
Snowball cookies, also known as Russian tea cakes or Mexican wedding cookies, are bite-sized confections made with a buttery dough, finely chopped nuts, and a heavy coating of powdered sugar. These cookies have been a family favorite for generations, especially during the holiday season. Their snowy appearance and melt-in-your-mouth texture make them irresistible.
Ingredients You’ll Need
Essential Ingredients
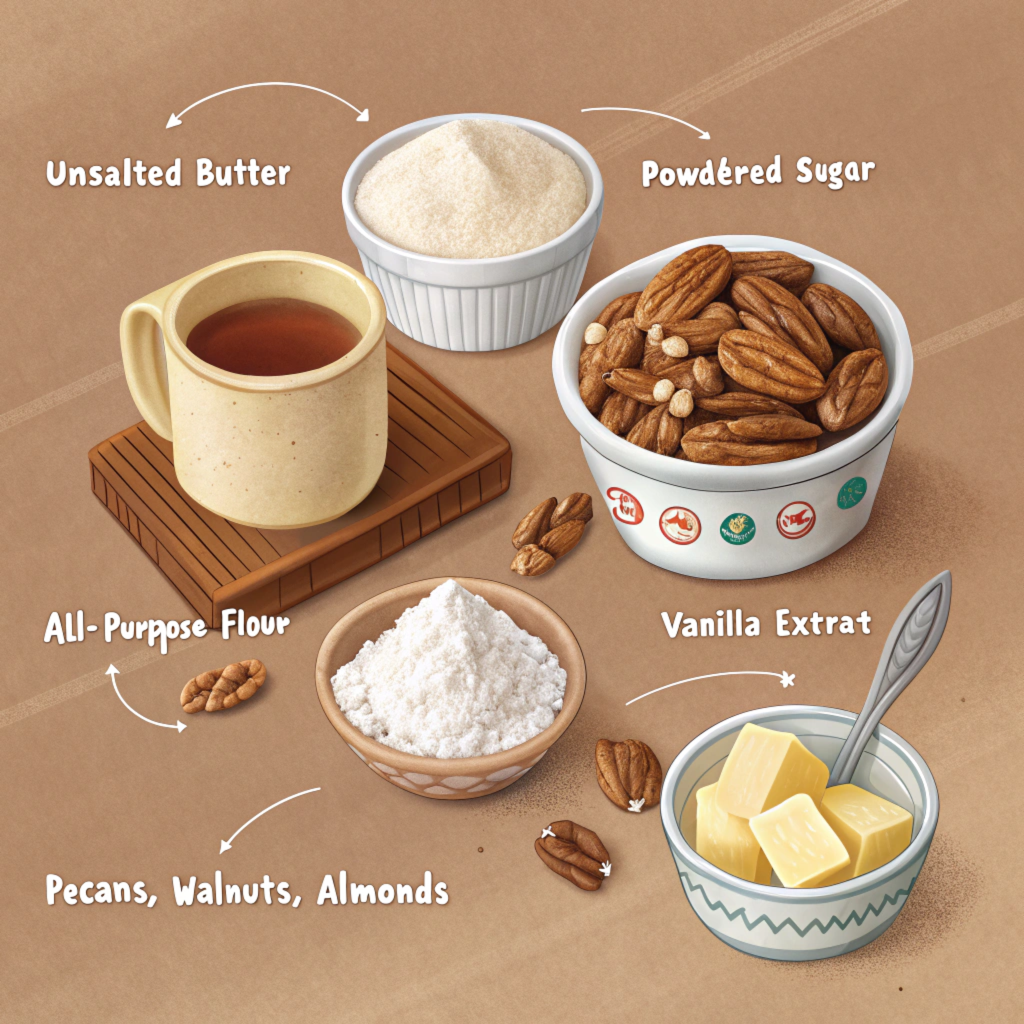
- Unsalted Butter (1 cup): The base of that rich, melt-in-your-mouth texture.
- Powdered Sugar (1 cup): For sweetness and that iconic snowy coating.
- All-Purpose Flour (2 cups): Holds everything together.
- Vanilla Extract (1 tsp): Adds warmth and depth to the flavor.
- Chopped Nuts (1 cup): Pecans, walnuts, or almonds add a lovely crunch.
Optional Add-Ins
- A pinch of salt to enhance the flavors.
- A dash of cinnamon or nutmeg for a warm, cozy twist.
Kitchen Equipment
- Mixing bowls
- Hand or stand mixer
- Baking sheet
- Parchment paper or silicone baking mat
- Cooling rack
- Measuring cups and spoons
- A small bowl for rolling cookies in powdered sugar
Step-by-Step Instructions
Preparing the Dough
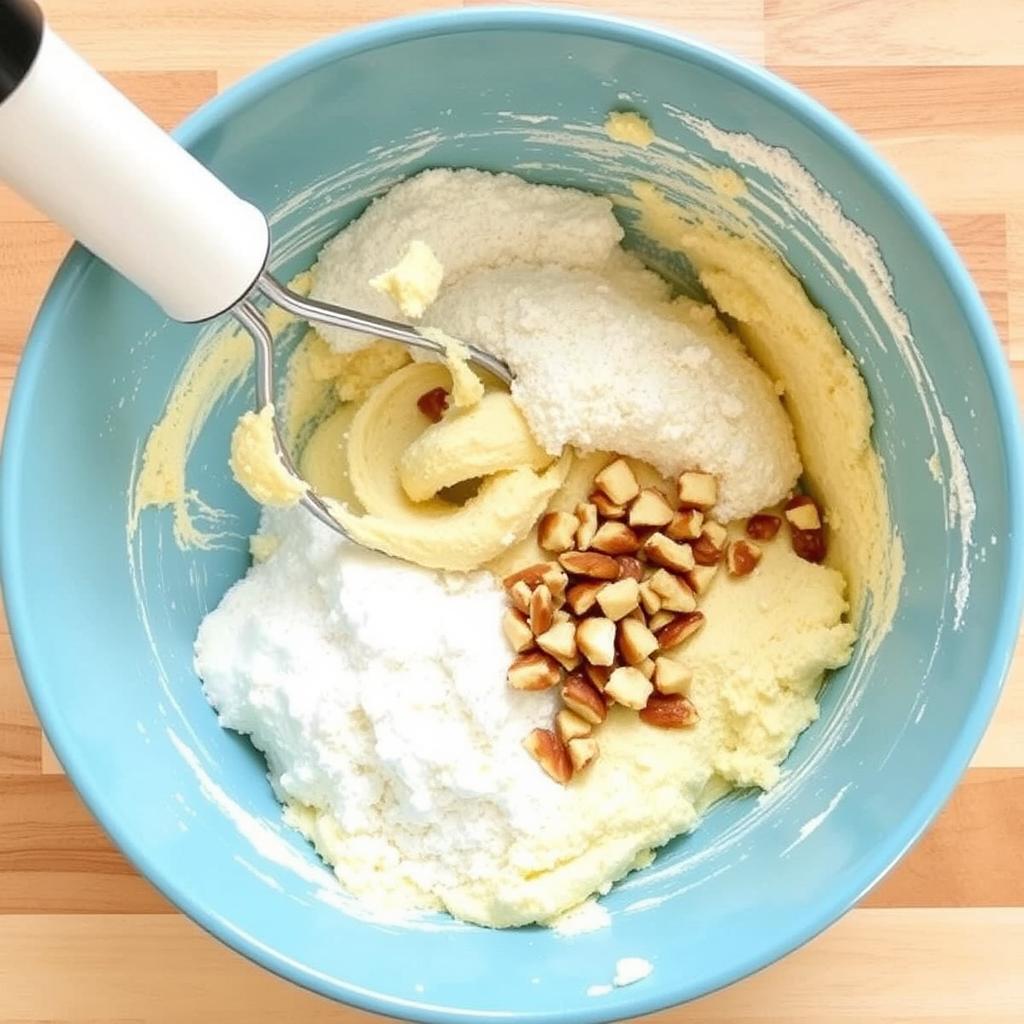
- In a large mixing bowl, cream together the unsalted butter and powdered sugar until it’s light and fluffy—this is where all the magic starts!
- Stir in the vanilla extract. It’s such a small touch, but it makes all the difference.
- Gradually add the all-purpose flour, mixing just until the dough comes together. Don’t overdo it—you want these cookies to stay soft and tender.
- Gently fold in the finely chopped nuts. This is when the kids usually come running to sneak a taste of the dough.
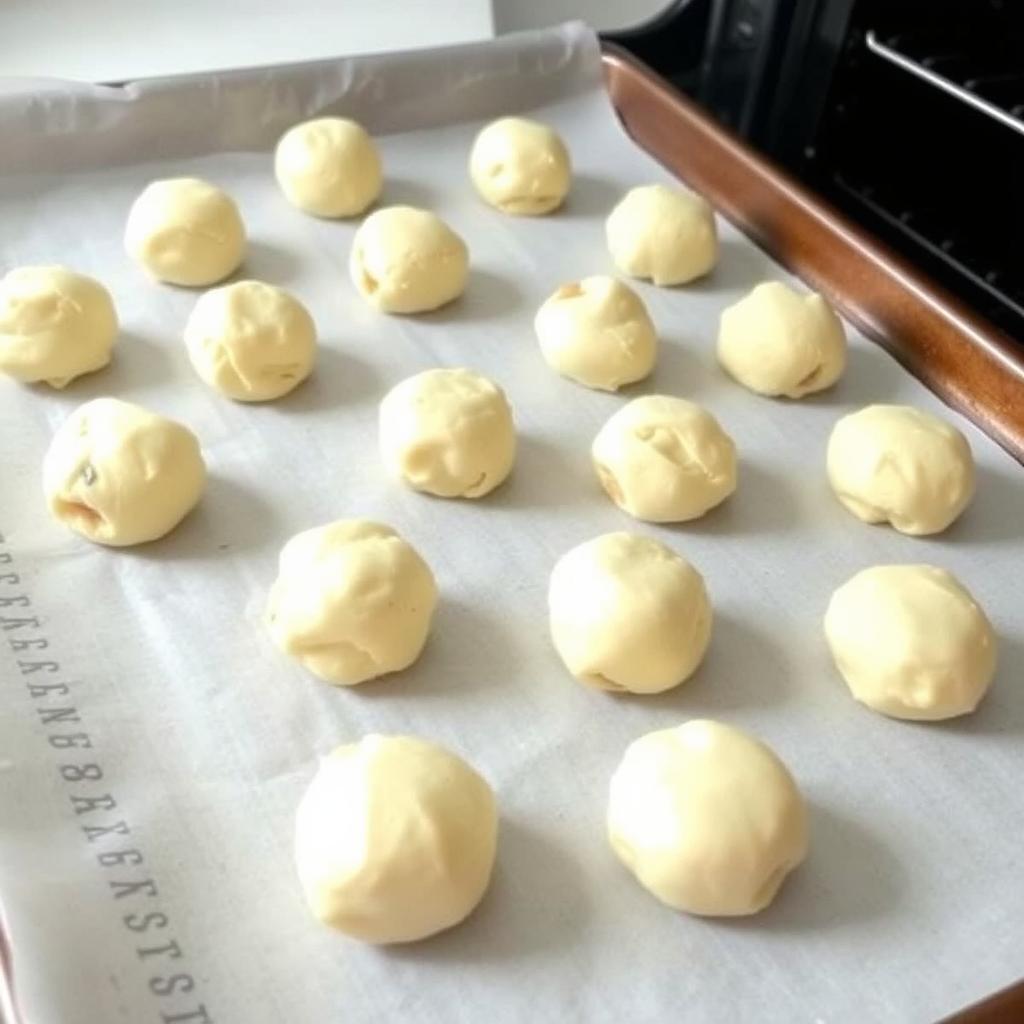
Shaping the Cookies
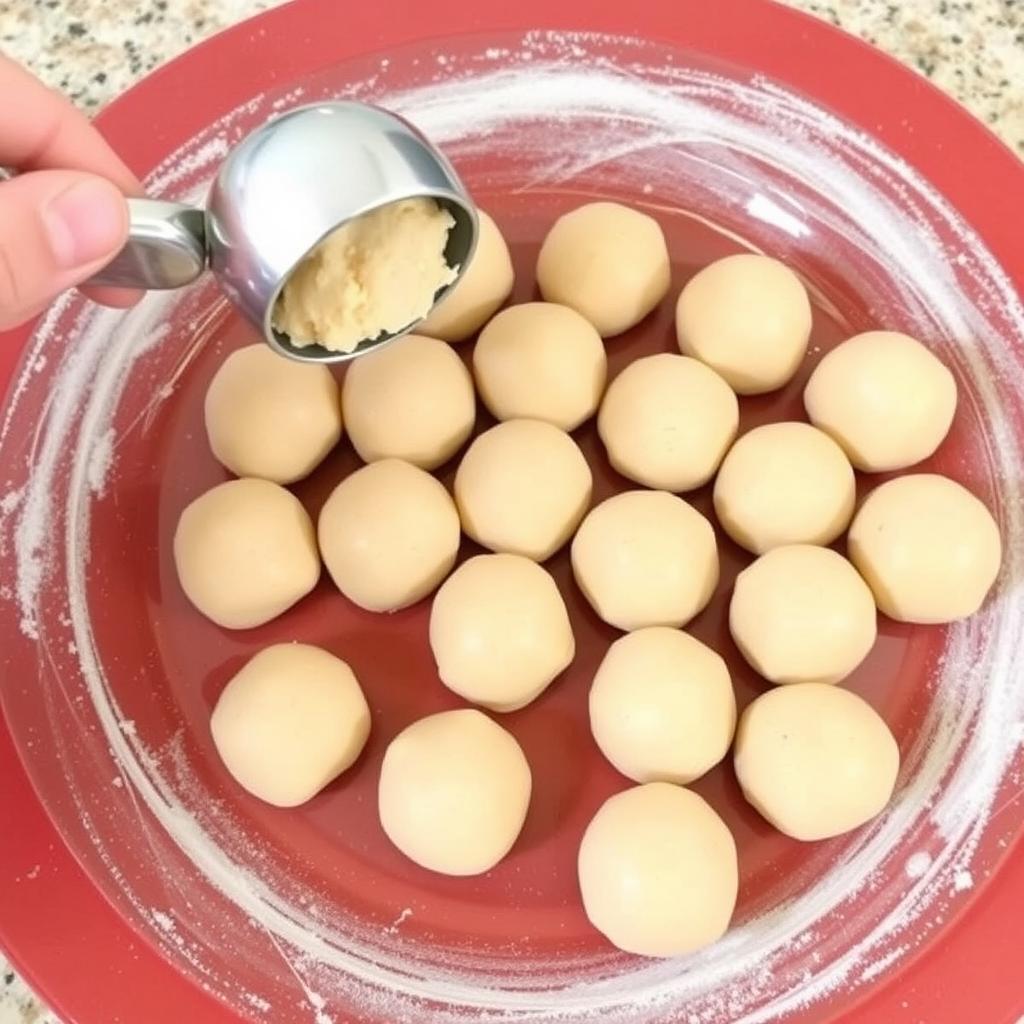
- Scoop out small portions of dough (about 1 tablespoon each).
- Roll the dough into smooth, even balls. If you’ve got little helpers, this step is perfect for them!
Baking the Cookies
- Preheat your oven to 350°F (175°C).
- Line a baking sheet with parchment paper for easy cleanup.
- Arrange the dough balls on the sheet, spacing them about 1 inch apart.
- Bake for 12-15 minutes or until the bottoms are just lightly golden. Your kitchen will smell amazing by now!
Coating with Sugar
- Let the cookies cool for about 5 minutes—just enough to handle them.
- Roll the warm cookies in powdered sugar for their first snowy coat.
- Once completely cooled, roll them again for that irresistible, fluffy finish.
Tips for Success
How to Achieve the Perfect Texture
- Start with softened butter to ensure your dough comes together easily.
- Mix just until combined to keep the cookies light and delicate.
Avoiding Common Mistakes
- Chop your nuts finely so they blend seamlessly into the dough.
- Let the cookies cool slightly before rolling them in sugar—this helps the sugar stick without clumping.
Recipe Variations
Gluten-Free Option
- Substitute the all-purpose flour with a gluten-free 1-to-1 baking mix. You’d never know the difference!
Vegan Option
- Use vegan butter and a powdered sugar alternative that’s plant-based.
Flavor Additions
- Add a hint of lemon or orange zest for a fresh, citrusy twist.
- Mix in mini chocolate chips for a fun variation your kids will adore.
Serving Suggestions
Pair these cookies with a warm cup of cocoa, your favorite tea, or even a glass of milk. They’re perfect for cozy afternoons or as a sweet treat after dinner.
Storing Leftovers
Store the cookies in an airtight container at room temperature for up to a week. For longer storage, freeze the cookies (before coating in powdered sugar) in a sealed container for up to 3 months. When ready to enjoy, thaw and roll them in powdered sugar.
Pairing Ideas
Snowball cookies are perfect with:
- Hot drinks like spiced chai, coffee, or mulled cider.
- Festive desserts like a yule log or holiday trifle.
Troubleshooting Guide
- Cookies Crumble Too Much: Add a teaspoon of milk to bind the dough better.
- Cookies Spread Too Much: Chill the dough for at least 30 minutes before baking.
Conclusion
Snowball cookies are more than just a dessert; they’re a little piece of joy that brings families together. Whether you’re making them for a holiday celebration or a quiet weekend treat, these cookies are guaranteed to make everyone smile. So, grab your apron, gather your little helpers, and start baking today!
Call to Action
If you love this recipe, share it with your friends and family! And don’t forget to subscribe to my blog for more family-friendly recipes and baking inspiration. Happy baking, moms!
FAQs
1. Can I make snowball cookies without nuts? Yes! Simply leave out the nuts for a nut-free version that’s just as delicious.
2. Can I use salted butter instead of unsalted? You can, but reduce or omit any extra salt in the recipe.
3. Why do my cookies flatten during baking? The dough might be too warm. Pop it in the fridge for 30 minutes before shaping.
4. Can I use a different type of sugar for coating? Powdered sugar gives the best look and texture, but granulated sugar could work in a pinch.
5. How can I make these cookies festive? Add colorful sprinkles to the powdered sugar or incorporate holiday spices like ginger or cloves.