
While browsing online for different egg-dying techniques, I stumbled across this idea for dying Easter Eggs with Kool-Aid packets. It seemed easy enough, so I decided we would give it a try.
To be quite honest, though, I did purchase a PAAS kit as a backup. ? And we ended up combining both methods to create a really cool tie-dye effect on the eggs.
Dying eggs with Kool-Aid ended up being easier than I had expected. Not only did the kids love doing it, but I love the vibrant color that the Kool-Aid gave to the eggs!
However, I will warn Kool-Aid stains and can get very sticky! In order to prevent your fingertips from getting discolored, I would recommend using disposable gloves. My fingers were already stained by the time I thought of doing this. ?
Overall the kids and I had a great time with this hands-on activity. If you decide to give it a try, I hope you enjoy it as much as we did!
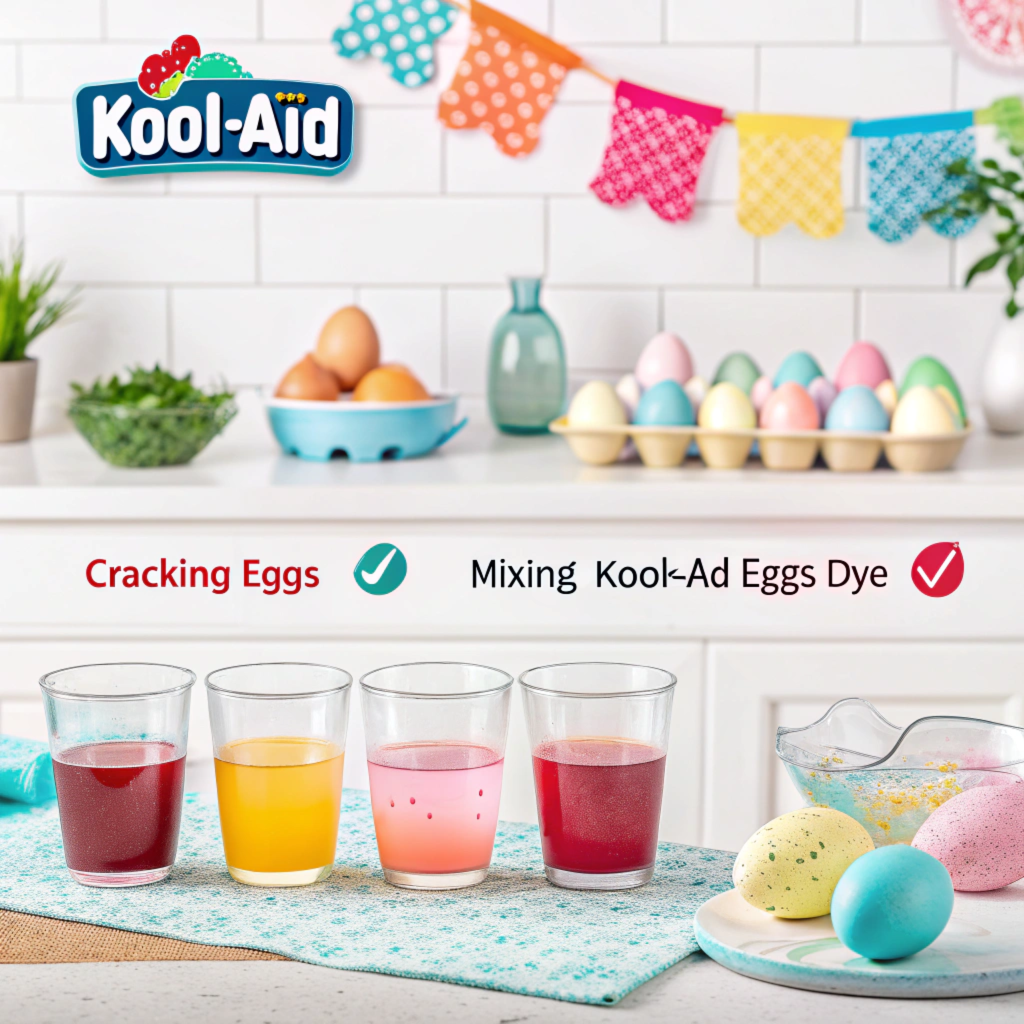
How To Dye Eggs

Here is how to dye Easter eggs with Kool-Aid:

- First, I put a cooling rack inside a large cake pan. I used my sheet cake pan, but a cookie sheet would work as well.
- Second, I put the PAAS tablets in each of the colored cups shown around the cooling rack and mixed according to the directions. While you do not need to use the traditional PAAS dye, it ended up working nicely for our project since I did not want to soak the whole egg in Kool-Aid.
- Next, I filled small cups with one packet of unsweetened Kool-Aid and one to two tablespoons of water, mixing until dissolved. We used grape, orange, pink lemonade, tropical punch, lemonade, Crystal Light Iced Tea, and lime. You can add more water if needed. We used one tablespoon in each cup, which made the color super concentrated and more vibrant.
- The kids then spooned out small amounts of the Kool-Aid mixtures onto the hard-boiled eggs resting on top of the cooling rack. We used smaller spoons, this way the kids didn’t end up pouring most of the mixture we had into the pan instead of on the eggs.
- As the kids scooped the mixture onto the eggs, I would turn them around so all sides could get coverage. Of course, this is why I ended up with stained fingers!
- Next, the kids used new toothbrushes to spread the mixture and make neat designs on the surface of the eggshell. You can use a gloved finger or a new paintbrush too.
- This Kool-Aid tie-dye recipe suggests rinsing the eggs once they have set with the color. I skipped that step because I loved the shiny look the Kool-Aid gave to the eggs. However, they are sticky this way, so I suggest rinsing them under cold water before you peel them.
- You can also make solid colored eggs by adding 2/3 of a cup of water to any packet of unsweetened Kool-Aid. Use a larger container to mix the water and Kool-Aid packet. Then leave the eggs in the mixture until you have reached the desired color.
A bonus perk was that our egg-dying fun smelled like Kool-Aid, not vinegar!
If your PAAS kit comes with plastic wraps or stickers use those to put final touches on your dyed eggs. In my picture, you can see we used some of the plastic wraps around the eggs we dyed. You wrap the egg, put it in a coffee mug, and pour boiling water on top, which shrinks the plastic to fit tight around the egg.
Another fun thing to do is to color on the hard-boiled eggs with crayons before dying them. White crayon usually works best but you can certainly use colored crayons as well.
If you decide to dye your Easter eggs with Kool-Aid this year, let me know how it turns out in the comments below! I’d also love to see any pictures you have on my Facebook page here!