
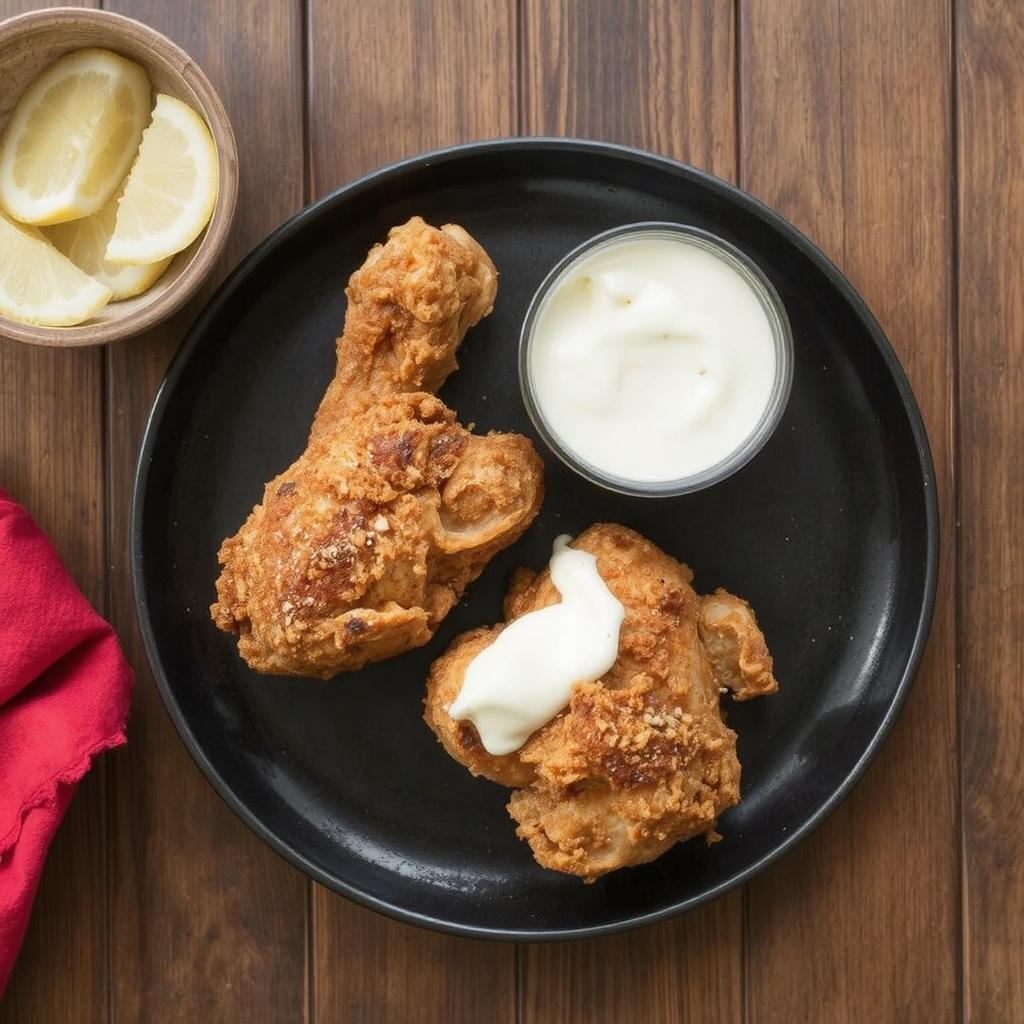
When it comes to comfort food that brings everyone together, nothing compares to classic buttermilk fried chicken. As a mom, I know how important it is to have recipes that are not only delicious but also loved by the whole family. With its crispy golden crust on the outside and tender, juicy meat on the inside, this dish is always a hit—whether it’s for a cozy family dinner, a special gathering, or even a casual Sunday lunch.
The best part? You don’t need fancy ingredients or advanced cooking skills to make it. With just a few simple steps, you can whip up restaurant-quality fried chicken right at home. And trust me, the smiles around the dinner table will make it all worth it!
Why You’ll Love This Recipe
This recipe is a mom’s best friend—it’s easy to follow and delivers amazing results every single time. Here’s why it’s a favorite in my kitchen:
- Beginner-Friendly: Whether you’re a seasoned cook or just starting out, this recipe is straightforward and foolproof.
- Flavor-Packed: The buttermilk marinade works its magic by tenderizing the chicken and adding a rich, tangy flavor everyone will rave about.
- Crispy and Delicious: The seasoned flour coating gives the chicken a perfect crunch that’s simply irresistible.
- Versatile: Pair it with mashed potatoes, coleslaw, or even some biscuits, and you’ve got a meal that works for any occasion.
Whether you’re planning a family feast or packing a picnic basket, this buttermilk fried chicken is sure to steal the show. Let’s get cooking and fill your home with the mouthwatering aroma of fried chicken that’s made with love!
Ingredients for Buttermilk Fried Chicken
- 2 lbs chicken pieces (drumsticks, thighs, or breasts)
- 2 cups buttermilk
- 2 cups all-purpose flour
- 1 teaspoon salt
- 1 teaspoon black pepper
- 1 teaspoon paprika
- 1 teaspoon garlic powder
- 1/2 teaspoon cayenne pepper (optional, for a spicy kick)
- 1/2 teaspoon baking powder
- Vegetable oil for frying
Kitchen Equipment You’ll Need
- Mixing bowls
- Tongs
- Whisk
- Large skillet or deep fryer
- Wire rack with a baking sheet (for draining the fried chicken)
- Meat thermometer (optional but recommended)
Step-by-Step Directions
1. Marinate the Chicken
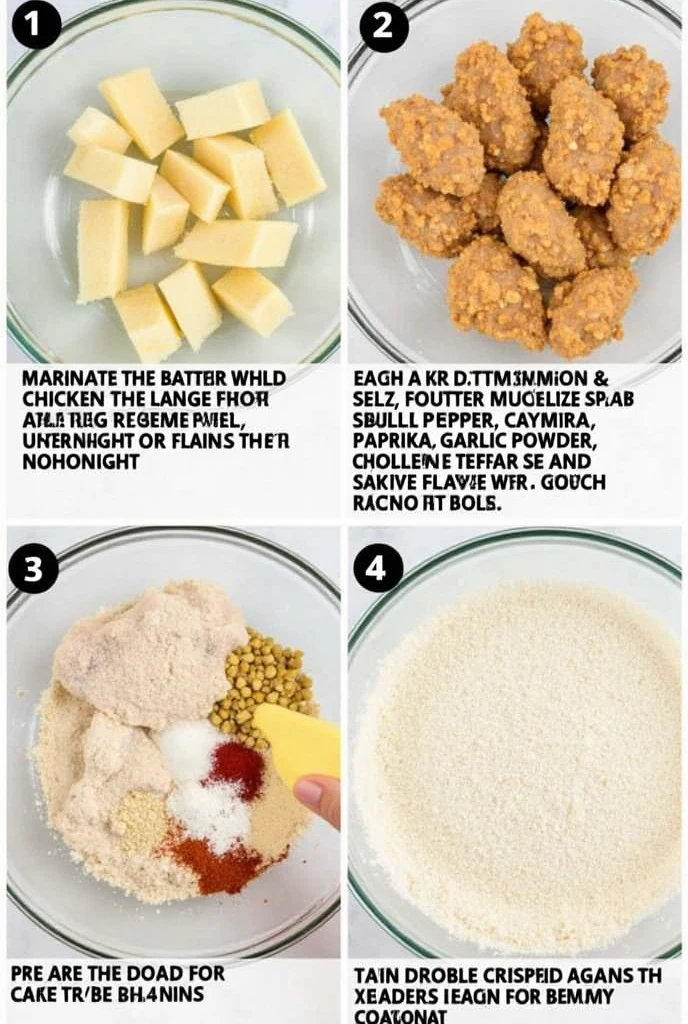
Place the chicken pieces in a large bowl and pour the buttermilk over them until fully submerged. Cover the bowl and refrigerate for at least 4 hours, or overnight for the best results. The buttermilk works to tenderize the chicken while adding a subtle tangy flavor.
2. Prepare the Coating
In a separate large bowl, combine the flour, salt, black pepper, paprika, garlic powder, cayenne pepper, and baking powder. Mix well to ensure the seasoning is evenly distributed.
3. Coat the Chicken
Remove the chicken from the buttermilk, allowing any excess to drip off. Dredge each piece in the seasoned flour mixture, pressing lightly to adhere. For an extra crispy coating, dip the floured chicken back into the buttermilk, then dredge it in the flour mixture again for a double coating.
4. Heat the Oil
In a large skillet or deep fryer, heat about 2 inches of vegetable oil to 350°F (175°C). Use a thermometer to maintain a consistent temperature, as this is key to achieving perfectly crispy fried chicken.
5. Fry the Chicken
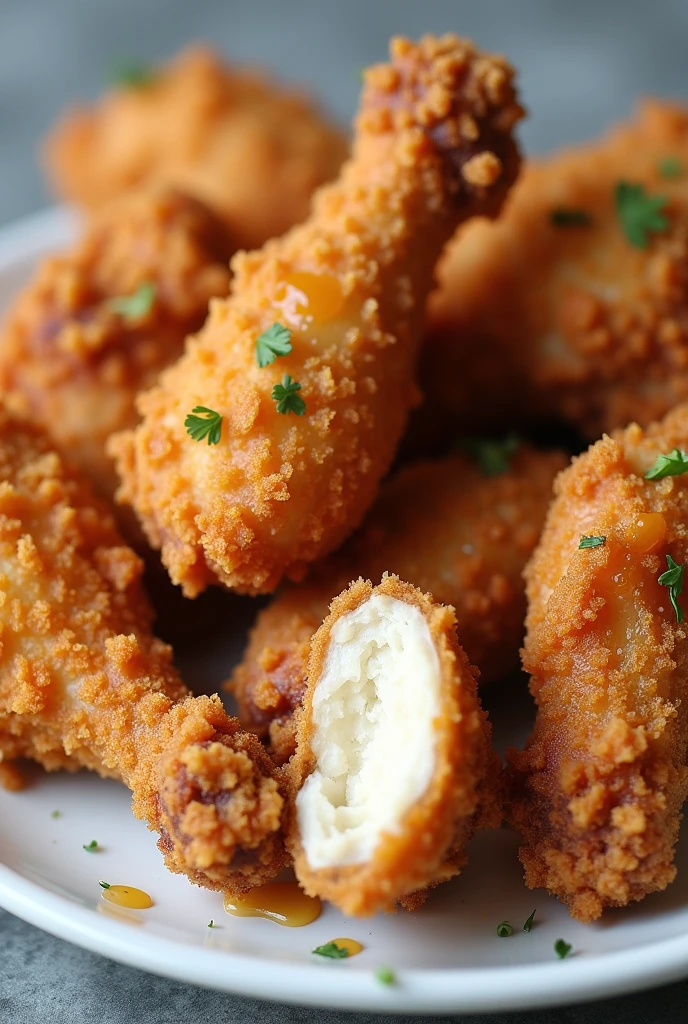
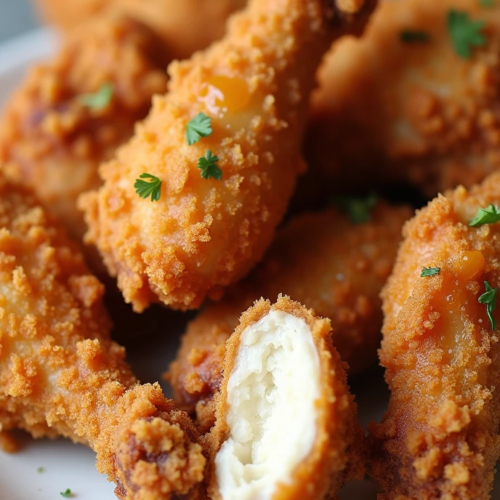
Carefully place the chicken pieces in the hot oil, making sure not to overcrowd the pan. Fry in batches if necessary. Cook each piece for 12-15 minutes, turning occasionally, until the chicken is golden brown and the internal temperature reaches 165°F (74°C).
6. Drain and Serve
Transfer the fried chicken to a wire rack set over a baking sheet to drain excess oil. Let it rest for a few minutes before serving to lock in the juices.
Tips for the Best Buttermilk Fried Chicken
- Use bone-in, skin-on chicken pieces for maximum flavor and juiciness.
- Don’t skip the resting step after frying. It allows the chicken to retain its crispiness while cooling slightly.
- Experiment with spices in the flour mixture. Add onion powder, smoked paprika, or dried herbs for a unique flavor profile.
- For an extra crispy crust, double-dip the chicken in the buttermilk and flour coating.
Storage and Reheating Tips
If you have leftovers (which might be rare!), store the fried chicken in an airtight container in the refrigerator for up to 3 days. To reheat, place the chicken on a wire rack in a 375°F (190°C) oven for 10-15 minutes. This method helps to restore the crispiness without drying out the meat.
Pairings and Serving Suggestions
Pair your buttermilk fried chicken with classic Southern sides like mashed potatoes, coleslaw, and cornbread. For a refreshing beverage, sweet tea or lemonade complements the rich flavors perfectly. Looking to elevate your meal? Add a drizzle of honey or serve with a spicy dipping sauce for a gourmet touch.
Frequently Asked Questions
Can I use boneless chicken for this recipe?
Absolutely! While bone-in chicken offers more flavor, boneless pieces like chicken tenders or breasts work well, especially for a quicker cooking time.
Can I bake the chicken instead of frying it?
Yes, you can bake the chicken for a healthier alternative. Place the coated chicken on a wire rack over a baking sheet, spray lightly with cooking oil, and bake at 400°F (200°C) for 25-30 minutes or until crispy and cooked through.
What if I don’t have buttermilk?
No buttermilk? No problem. Make a substitute by mixing 2 cups of milk with 2 tablespoons of white vinegar or lemon juice. Let it sit for 5 minutes before using.
Final Thoughts
This buttermilk fried chicken recipe is a must-try for anyone craving a comforting, homemade meal that delivers on flavor and texture. With its crispy coating and tender, juicy meat, it’s bound to become a family favorite. Perfect for weeknight dinners or weekend gatherings, it’s a recipe you’ll turn to again and again.
Don’t keep this delicious recipe to yourself! Share it with friends and family, and be sure to subscribe to our blog for more mouthwatering recipes and cooking tips. Let us know in the comments how your fried chicken turned out. Happy cooking!
Buttermilk Fried Chicken: Crispy, Juicy, and Perfectly Seasoned
Equipment
- Mixing bowls
- Tongs
- Whisk
- Large skillet or deep fryer
- Wire rack with a baking sheet (for draining the fried chicken)
- Meat thermometer (optional but recommended)
Ingredients
- 2 lbs chicken pieces (drumsticks, thighs, or breasts)
- 2 cups buttermilk
- 2 cups all-purpose flour
- 1 teaspoon salt
- 1 teaspoon black pepper
- 1 teaspoon paprika
- 1 teaspoon garlic powder
- 1/2 teaspoon cayenne pepper (optional, for a spicy kick)
- 1/2 teaspoon baking powder
- Vegetable oil for frying
Notes
Step-by-Step Directions
1. Marinate the Chicken
Place the chicken pieces in a large bowl and pour the buttermilk over them until fully submerged. Cover the bowl and refrigerate for at least 4 hours, or overnight for the best results. The buttermilk works to tenderize the chicken while adding a subtle tangy flavor.2. Prepare the Coating
In a separate large bowl, combine the flour, salt, black pepper, paprika, garlic powder, cayenne pepper, and baking powder. Mix well to ensure the seasoning is evenly distributed.3. Coat the Chicken
Remove the chicken from the buttermilk, allowing any excess to drip off. Dredge each piece in the seasoned flour mixture, pressing lightly to adhere. For an extra crispy coating, dip the floured chicken back into the buttermilk, then dredge it in the flour mixture again for a double coating.4. Heat the Oil
In a large skillet or deep fryer, heat about 2 inches of vegetable oil to 350°F (175°C). Use a thermometer to maintain a consistent temperature, as this is key to achieving perfectly crispy fried chicken.5. Fry the Chicken
Carefully place the chicken pieces in the hot oil, making sure not to overcrowd the pan. Fry in batches if necessary. Cook each piece for 12-15 minutes, turning occasionally, until the chicken is golden brown and the internal temperature reaches 165°F (74°C).6. Drain and Serve
Transfer the fried chicken to a wire rack set over a baking sheet to drain excess oil. Let it rest for a few minutes before serving to lock in the juices.Tips for the Best Buttermilk Fried Chicken
- Use bone-in, skin-on chicken pieces for maximum flavor and juiciness.
- Don’t skip the resting step after frying. It allows the chicken to retain its crispiness while cooling slightly.
- Experiment with spices in the flour mixture. Add onion powder, smoked paprika, or dried herbs for a unique flavor profile.
- For an extra crispy crust, double-dip the chicken in the buttermilk and flour coating.